This is a quick reference guide on how to use a welding fillet gauge. Welding gauges are probably one of the more underused tools in a welder’s arsenal. Many other manuals do not do justice in explaining how to use a welding fillet gauge properly. Improper use of a welding fillet gauge can cost you countless hours of headache and extra work.
First thing first, the two types of measurement that you do with a Fillet Welding Gauge are checking throat thickness and checking leg length.
Reading a Welding Fillet Gauge
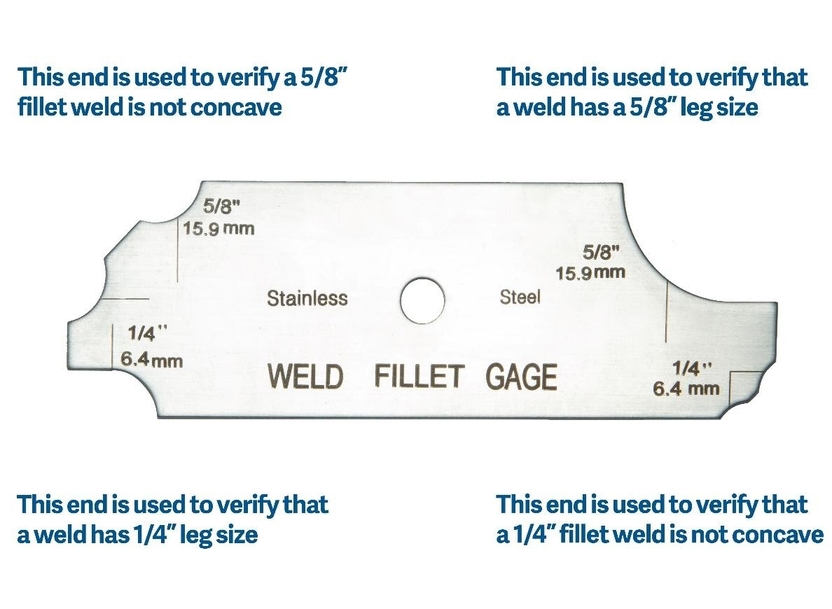
Reading a Welding Fillet gauge is simple and straight forward. Each end of the gauge either measures leg length or throat thickness. Calculating leg length will always be the convex sides of the welding fillet gauge. Calculating throat thickness on the fillet gauges will be the sides with the protrusions in the middle of its side.

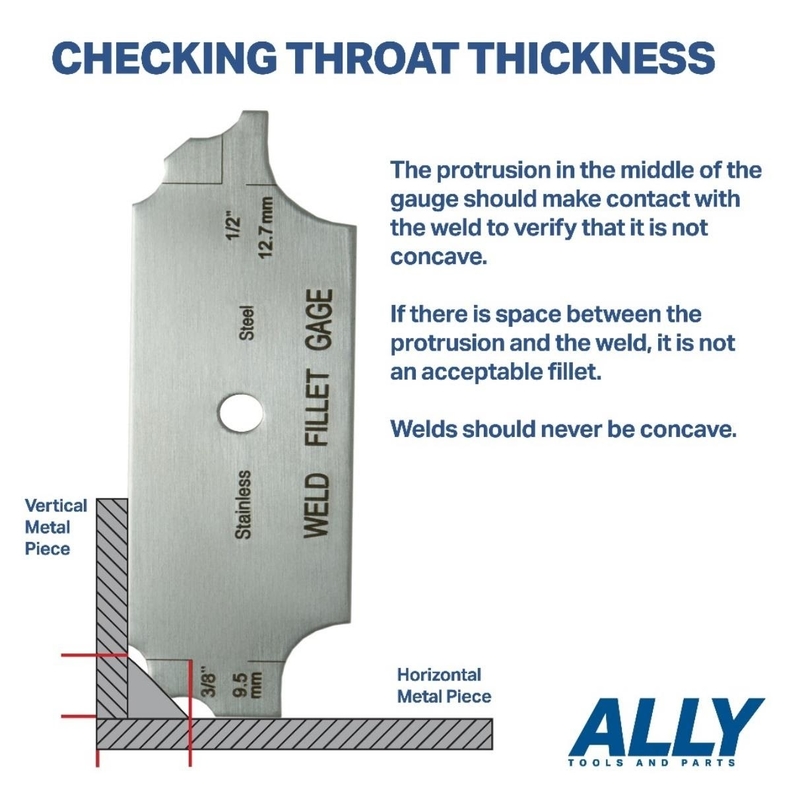
Checking Throat Thickness
With your weld in hand, grab one of the fillet welding gauges to measure the throat thickness according to your specified required thickness. Check if the protrusion in the middle of the fillet gauge contacts your weld. If there is space between the weld and the protrusion, you need to fix your weld. If there is no space, then that means you did an excellent job.

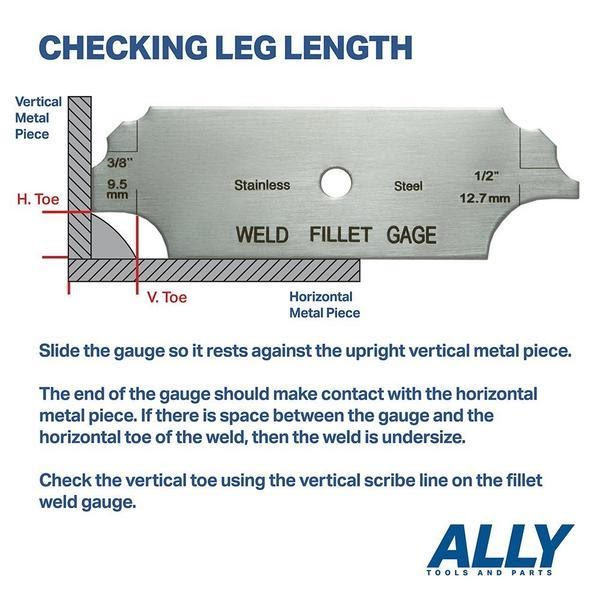
Checking Leg Length
The next type of measurement that a Welding Fillet Gauge does is checking leg length. To do this, grab the fillet weld gauge that is required for your weld specification. Slide the gauge so its rests against the vertical metal piece of your weld. If you notice there is space between the Horizontal Toe a.k.a “H. Toe” and the weld, then your weld is undersize horizontally and must be fixed.

If you notice that the weld does not extend all the way to the Vertical Toe a.k.a “V. Toe” then your weld is undersized vertically and must be fixed.
ALLY Tools is a leading brand of welding accessories on Amazon.com. They provide a variety of useful welding hand tools that are perfect for your welding shop. Go visit their website to see their entire product line and get useful tips!

